
Key takeaways
- Skipping the stability test: A table that rocks when empty will be more dangerous once your dog moves.
- Using the wrong weight capacity: Include your dog’s current weight, not an estimate of its adult weight or a previous weight.
- Leaving the dog unattended: A grooming loop is a positioning aid, not a substitute for supervision.
- Making the loop too tight: Tight restraint can interfere with breathing and increase panic.
- Grooming on a wet surface: Water increases slipping and creates an electrical hazard around clippers and dryers.
- Starting with loud tools: Let your dog hear clippers and dryers from a distance before bringing them close.
- Forcing a frightened dog: Stop if your dog is panting heavily, shaking, snapping, freezing, or trying to escape.
- Using household scissors on mats: Skin can be pulled into a mat and accidentally cut. Have severe matting handled by a professional.
Learning how to set up a dog grooming table correctly makes grooming safer, steadier, and less stressful for both you and your dog. A rushed setup can lead to a wobbly table, a slipping dog, tangled grooming loops, or a frightened pet jumping from the edge. Falls can cause serious injuries, especially in older, small, or anxious dogs. Before the first session, choose a stable location, inspect every attachment, and introduce the table gradually. These steps will help you create a reliable home grooming station in 2026 and beyond.
What You Need
| Item | Why | Optional? |
|---|---|---|
| Dog grooming table | Provides a raised, non-slip work surface at a comfortable height. Common home models are about 32 inches wide and typically cost roughly $64 to $70. | No |
| Grooming arm and safety loop | Helps keep the dog positioned on the table. Use the loop only for gentle positioning, never to lift, choke, or restrain a struggling dog. | Usually included |
| Non-slip mat | Gives your dog traction and is easier to clean than a bare tabletop. | Usually included |
| Brushes, combs, and detangling spray | Let you remove loose hair and mats before bathing or trimming. | No |
| Clippers or grooming scissors | Needed for coat trimming. Clippers are generally easier for beginners to control. | Yes |
| Nail grinder or clipper | For routine nail care while your dog is calmly positioned. | Yes |
| Towels and a washable cleanup cloth | Help control loose hair, water, and product residue. | No |
| High-value treats | Build positive associations with standing on the table and being handled. | Recommended |
| Power strip with surge protection | Provides an organized power source for clippers or a dryer. Keep cords away from water and the dog’s feet. | Yes |
Step-by-Step
1. Choose a safe location (5 minutes)
Set the table on a flat, hard floor with enough room to walk around all four sides. A clear area of at least 6 by 6 feet is practical for a typical home grooming station. Avoid rugs, wet floors, crowded hallways, and areas beside open doors or staircases.
As an Amazon Associate we earn from qualifying purchases at no extra cost to you. Product prices and availability are accurate as of the date shown and are subject to change.
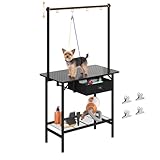
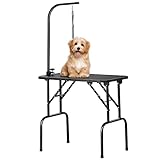
Place the table near good lighting and a grounded electrical outlet if you will use clippers or a dryer. Do not position it directly beneath a ceiling fan, where loose hair can spread, or beside a sink where water can splash onto electrical equipment. Keep other pets and young children out of the area during grooming.
2. Unpack and inspect every part (5 to 10 minutes)
Lay out the tabletop, legs or folding frame, grooming arm, loop, mat, tray, fasteners, and any tools included with the table. Check the surface for cracks, sharp edges, bent metal, or exposed screws. Examine the loop for fraying and confirm that clips open and close securely.
Read the table’s weight rating before using it. Never assume a table rated for a small dog is suitable for a heavier breed. The dog’s weight should remain comfortably below the listed maximum, with enough capacity for movement. If the instructions conflict with a product listing, follow the printed manufacturer instructions.
3. Assemble the frame and legs (10 to 20 minutes)
Follow the supplied assembly diagram rather than tightening parts randomly. Open folding legs completely or attach fixed legs in the correct orientation. Insert each bolt, washer, and nut before fully tightening; this makes it easier to align the frame.
Once the tabletop is level, tighten the hardware firmly with the supplied wrench. Do not overtighten screws into plastic or thin metal. If the table has adjustable feet, turn them until all four corners sit flat. Press down on each corner and gently rock the frame from side to side. There should be no wobble, shifting, or clicking.
4. Install the tray and tabletop mat (5 minutes)
Slide the mesh or grooming tray into its supports, if your model includes one. The tray should sit fully in its tracks and should not drop when lightly pressed. A tray catches hair and debris, but it is not a step or a weight-bearing surface.
Clean the tabletop, then place the non-slip mat with its textured side facing up. Align it so no edge curls into the dog’s walking area. Washable mats should be completely dry before use. If the mat slides when you push it with your hand, stop and correct the fit before putting your dog on the table.
5. Attach and adjust the grooming arm (5 to 10 minutes)
Insert the grooming arm into its mounting socket and tighten the knob or clamp until the arm cannot rotate. Do not rely on a partially tightened clamp. Pull upward and sideways with moderate hand pressure to check that it remains secure.
Attach the loop to the arm and adjust it so it rests loosely around the dog’s neck or chest area, depending on the manufacturer’s design. You should be able to slide two fingers between the loop and your dog. The dog must be able to breathe, swallow, and move its head naturally.
Keep one hand on your dog whenever it is elevated. Never leave a dog unattended on the table, even when the loop is attached. Do not use a grooming loop on a dog that is panicking, choking, or repeatedly trying to jump.
6. Test the finished setup without your dog (3 minutes)
Push the table from several directions, inspect the leg locks, and check that the arm and tray remain secure. Run clippers or a dryer briefly away from the table to confirm that cords reach without stretching across a walkway. Use a cord cover or route cords behind the table, not around the dog’s legs.
Keep hot clipper blades, scissors, dryer nozzles, and grooming products where your dog cannot reach them. Clippers can become hot during use, so check the blade temperature against your wrist frequently and switch blades if they feel uncomfortably warm.
7. Introduce your dog gradually (5 to 15 minutes)
Let your dog sniff the table while it is folded or fully assembled but empty. Reward calm behavior. Next, invite your dog to place two paws on the mat, then four paws, offering treats at each stage. For a small dog, lift with one hand supporting the chest and the other supporting the hips. Larger dogs should step up with assistance if the table design permits it; do not force a jump onto a raised surface.
For the first session, practice standing for only one to three minutes. Touch the paws, ears, tail, and coat without trimming. End while your dog is still calm. Gradually increase the time over several sessions rather than attempting a full haircut immediately.
8. Clean and store the table (5 to 10 minutes)
Turn off and unplug electrical tools before cleaning. Brush hair from the tray and mat, then wash the mat according to its care instructions. Wipe the tabletop and arm with a pet-safe cleaner and allow all surfaces to dry completely.
Inspect the hardware after each use. If the table folds, keep it locked in its folded position and store it in a dry area where children and pets cannot pull it down.
Mistakes to Avoid
- Skipping the stability test: A table that rocks when empty will be more dangerous once your dog moves.
- Using the wrong weight capacity: Include your dog’s current weight, not an estimate of its adult weight or a previous weight.
- Leaving the dog unattended: A grooming loop is a positioning aid, not a substitute for supervision.
- Making the loop too tight: Tight restraint can interfere with breathing and increase panic.
- Grooming on a wet surface: Water increases slipping and creates an electrical hazard around clippers and dryers.
- Starting with loud tools: Let your dog hear clippers and dryers from a distance before bringing them close.
- Forcing a frightened dog: Stop if your dog is panting heavily, shaking, snapping, freezing, or trying to escape.
- Using household scissors on mats: Skin can be pulled into a mat and accidentally cut. Have severe matting handled by a professional.
How Often
Check the table’s legs, locks, bolts, arm clamp, loop, and mat before every grooming session. Perform a more detailed inspection at least once a month if you use the table regularly. Wash the mat after each session or whenever it becomes damp, visibly dirty, or coated with product.
Grooming frequency depends on the dog’s coat. Short-haired dogs may need brushing once or twice a week, while long, curly, or double-coated dogs may need daily brushing. Nail trimming often occurs every three to four weeks, but individual nail growth varies. Follow a routine that keeps your dog comfortable rather than waiting for severe tangles or overgrown nails.
When to Call a Pro or Replace
Call a professional groomer if your dog has dense mats close to the skin, a skin infection, painful joints, severe anxiety, or a history of biting during handling. A groomer or veterinarian can also help if nails are black, overgrown, or difficult to trim safely.
Replace the table if the frame bends, a leg lock fails, the tabletop cracks, the non-slip mat remains slick, or the grooming arm rotates after tightening. Replace a frayed loop immediately. Do not repair a weight-bearing part with tape, household wire, or improvised hardware. If your dog outgrows the table’s weight or surface dimensions, move to a model designed for its size.
FAQ
Should a dog grooming table be against a wall?
It can be placed near a wall to save space, but you still need enough room to access your dog safely. Keep the table several inches from the wall so the arm, cords, and your hands are not trapped. A clear area around the table is safer than using a tight corner.
Can I use a grooming table without the safety loop?
For brief training, you can practice standing on the mat without attaching the loop while keeping both hands and your attention on the dog. During grooming, use the manufacturer-approved loop when appropriate, but never use it as a restraint for a panicking or aggressive dog.
How high should a dog grooming table be?
The surface should let you work with relaxed shoulders and a mostly straight back. Many home tables are approximately 32 inches wide and have a fixed or adjustable height. Choose a height that suits your body and your dog’s size, while keeping the dog stable and easy to reach.
What should I do if my dog is afraid of the table?
Break the process into small steps: sniffing the table, touching the mat, standing briefly, hearing the clippers, and accepting gentle handling. Reward calm behavior and stop before your dog becomes distressed. If fear persists or escalates, consult a qualified groomer or a veterinarian-recommended behavior professional.




Write Your Review
No reviews yet. Be the first to share your experience!