
Key takeaways
- Grinding continuously for 10 seconds or more on one nail: Long contact creates unnecessary friction and can heat the nail quickly.
- Pressing harder when the grinder slows down: Stop, clean the attachment, recharge the battery, or replace the sanding band instead.
- Ignoring packed dust: Clean the nail port and vents after every grooming session, and more often when trimming thick nails.
- Using a damaged attachment: A cracked stone, loose band, or warped drum can vibrate, heat up, and leave rough nail edges.
- Starting at high speed for every dog: High speed can be useful for thick nails, but it is not automatically better. Use the lowest speed that removes nail material efficiently.
- Trying to finish all nails when your dog is stressed: Stop after a few successful nails. Positive, brief sessions are more sustainable.
- Storing the grinder in a hot car or damp bathroom: Heat and humidity can shorten battery life and encourage dust buildup.
A dog nail grinder can overheat fast when it is pressed too hard, used continuously, clogged with nail dust, or fitted with a worn sanding band. That heat can make the tool uncomfortable to hold, shorten battery and motor life, and—more importantly—warm your dog’s nail enough to cause pain. A hot grinder also tends to make dogs nervous during future grooming sessions.
The fix is usually simple: use short passes, let the grinder rest, clean the grinding head, and choose the right speed for the nail. The goal is not to finish every nail in one long session. It is to remove tiny amounts gradually while keeping both the grinder and the nail cool.
Our top picks
 Whisper Quiet Dog Nail Grinder Safe &
- Product Group: Pet Products
- Binding: Misc.
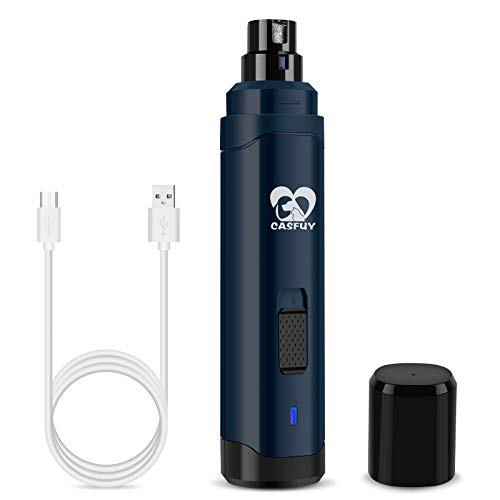 Casfuy Dog Nail Grinder Upgraded
- Product Group: Pet Products
- Binding: Health and Beauty
As an Amazon Associate we earn from qualifying purchases at no extra cost to you. Ratings are shown as listed on Amazon.
What You Need
| Item | Why | Optional? |
|---|---|---|
| Dog nail grinder | Use a pet-specific grinder with a guarded opening or sanding drum sized for your dog’s nails. | No |
| Fresh sanding band or grinding wheel | A worn or clogged abrasive makes you press harder, which creates excess heat. | No |
| Small cleaning brush | Removes nail dust from the guard, vents, grinding head, and motor housing. | No |
| Dry microfiber cloth | Useful for wiping dust from the grinder exterior and your dog’s paw. | Yes |
| Treats | Helps your dog stay calm during short, low-pressure grooming sessions. | Yes |
| Styptic powder | Can help stop minor bleeding if you accidentally nick the quick. | Recommended |
| Timer or phone stopwatch | Keeps each grinding contact brief and reminds you to pause. | Recommended |
If you are replacing an older tool, expect many basic rechargeable dog grinders to fall around the $18 to $23 range. For example, a Whisper Quiet Dog Nail Grinder for sensitive dogs and cats is listed for under $30, while the Casfuy Upgraded Professional 2-Speed grinder is listed for under $20. A two-speed model can be helpful because lower speed is often easier to control on small or thin nails, while higher speed may shorten the working time on thick adult nails.
Step-by-Step
1. Turn off the grinder and let it cool completely (5 to 15 minutes)
If the housing feels noticeably warm, the sanding head feels hot, or the motor sounds strained, stop immediately. Switch the grinder off and place it on a dry, hard surface away from your dog. Do not put it in a refrigerator, freezer, or under running water; sudden cooling and moisture can damage the battery, motor, or electronics.
Most mild heat buildup will dissipate after 5 to 15 minutes. If the unit is too hot to comfortably hold for several seconds, give it more time. Never resume while the grinding head is still hot.
2. Remove nail dust from the head, guard, and vents (3 to 5 minutes)
Unplug the grinder if it has a cord. For rechargeable models, turn it off before cleaning and follow the manufacturer’s instructions for removing the guard or sanding attachment. Use a small dry brush to clear compacted nail dust from the grinding stone, sanding drum, nail port, and ventilation slots.
Dust is one of the most common causes of overheating. It acts like insulation around moving parts and reduces airflow through the motor housing. Wipe the exterior with a dry microfiber cloth. Avoid spraying cleaner directly into the grinder or using a wet cloth near vents, charging ports, or switches.
3. Inspect and replace the abrasive attachment if needed (2 to 4 minutes)
Look closely at the sanding band or grinding wheel. Replace it if it is smooth, torn, cracked, shiny with compacted dust, loose on the drum, or noticeably uneven. A fresh abrasive removes nail material efficiently with very light contact. A worn one forces you to push, and pressure creates friction.
For a sanding-band style grinder, make sure the band sits straight and snugly on its drum. For a stone or diamond-style head, clean the grooves carefully and replace the attachment if it is chipped or no longer cuts smoothly. Use only attachments designed for your grinder model.
4. Recharge correctly, but do not grind while charging (30 minutes to several hours, depending on model)
Low battery power can make some cordless grinders labor, especially on large, dense nails. Charge the tool according to its manual before a full grooming session. However, do not use the grinder while it is connected to its charging cable unless the manufacturer specifically says that is safe.
Use the included charging cable or a compatible power source specified by the manufacturer. If the grinder becomes hot during charging, disconnect it and let it cool. Repeated charging heat, swelling, a burning smell, or a damaged charging port are signs to stop using the unit.
5. Set up your dog for short, calm nail sessions (2 to 5 minutes)
Choose a bright, quiet room and place your dog on a non-slip surface. For a small dog, a folded towel on a table can provide traction; for a larger dog, work on the floor with a bath mat beneath the paws. Keep treats within reach.
Before turning on the grinder, touch each paw briefly and reward calm behavior. Then let your dog hear the grinder from a distance for a few seconds. This reduces sudden movement, which helps you use lighter, safer contact once you begin.
6. Grind in tiny bursts instead of one long hold (about 1 to 2 minutes per paw)
Use the lowest effective speed first. Hold the grinder so the abrasive meets the nail at a slight angle rather than pressing straight into the tip. Touch the nail for 1 to 2 seconds, lift away, and check both the nail and the grinder head. Repeat as needed.
For thick nails, use a pattern of 2 seconds on, 3 to 5 seconds off. For small, thin, or dark nails, keep contacts closer to 1 second. Rotate around the nail tip instead of grinding one spot continuously. This produces a rounded edge while spreading friction over a wider area.
Apply only enough pressure to keep the nail in contact with the abrasive. The grinder should do the work. If the motor pitch drops, the tool bogs down, or your dog pulls away, reduce pressure and pause.
7. Check nail temperature frequently (10 seconds between passes)
After every two or three brief touches, stop and feel the outside of the nail near the tip with the back of your finger. It should feel neutral or only slightly warm. If it feels hot, stop working on that nail and move to another paw while it cools.
Do not try to cool a hot nail with ice water. Just allow a few minutes of air cooling. If your dog reacts sharply, yelps, licks the paw, or refuses to continue, end the session and inspect the nail for sensitivity or injury.
8. Build in a grinder rest period (5 minutes after 5 to 10 minutes of use)
Even a well-maintained grinder can warm up during a full four-paw session. After 5 to 10 minutes of active use, turn it off for about 5 minutes. During that break, offer a treat, check nail lengths, and brush away dust from the paw.
For dogs with large nails, plan to do front paws first and rear paws later the same day or the next day. Splitting the job is better than overheating the tool or rushing your dog.
Mistakes to Avoid
- Grinding continuously for 10 seconds or more on one nail: Long contact creates unnecessary friction and can heat the nail quickly.
- Pressing harder when the grinder slows down: Stop, clean the attachment, recharge the battery, or replace the sanding band instead.
- Ignoring packed dust: Clean the nail port and vents after every grooming session, and more often when trimming thick nails.
- Using a damaged attachment: A cracked stone, loose band, or warped drum can vibrate, heat up, and leave rough nail edges.
- Starting at high speed for every dog: High speed can be useful for thick nails, but it is not automatically better. Use the lowest speed that removes nail material efficiently.
- Trying to finish all nails when your dog is stressed: Stop after a few successful nails. Positive, brief sessions are more sustainable.
- Storing the grinder in a hot car or damp bathroom: Heat and humidity can shorten battery life and encourage dust buildup.
How Often
Check your dog’s nails every 1 to 2 weeks. Many dogs need a light grind every 2 to 4 weeks, though the schedule depends on activity, surface type, age, and nail growth. Dogs that walk often on pavement may need less frequent shaping, while indoor dogs and dogs with dewclaws often need more regular attention.
Frequent light maintenance is easier on the grinder than occasional major shortening. Removing 1 to 2 millimeters at a time helps keep nails manageable and reduces the need for long, heat-producing sessions. Dewclaws should be checked separately because they usually do not wear down on the ground.
When to Call a Pro or Replace
Contact a veterinarian or qualified groomer if your dog has a broken nail, bleeding that does not stop with basic first aid, swelling, discharge, limping, persistent paw licking, or obvious pain. Professional help is also wise for severely overgrown curled nails, especially when a nail is approaching or touching the paw pad.
Replace the grinder if it overheats after cleaning and using a fresh attachment, loses power with a full charge, makes grinding or rattling noises, gives off a burning odor, has cracked housing, or has a swollen battery. A tool that becomes hot within a minute or two of light use is not reliable enough for safe nail care.
FAQ
Why does my dog nail grinder get hot so quickly?
The usual causes are heavy pressure, a clogged sanding head, blocked vents, a worn abrasive, low battery power, or long uninterrupted use. Clean the tool, replace worn parts, recharge it properly, and switch to 1- to 2-second grinding bursts.
How long should I grind one dog nail?
Use brief contact rather than timing the entire nail. Start with 1 to 2 seconds of contact, then lift the grinder away for 3 to 5 seconds. A single nail may take several short passes, particularly if it is thick or needs reshaping.
Can I use water to cool an overheated nail grinder?
No. Water can damage the motor, battery, charging port, and internal electronics. Turn the grinder off, set it on a dry surface, and let it cool naturally. Use a dry brush to remove dust once the tool is cool.
Is a two-speed dog nail grinder worth it?
It can be useful for households with dogs of different sizes or dogs with especially thick nails. A lower setting offers more control for small dogs and cautious training, while a higher setting may reduce total grinding time on larger nails. Regardless of speed, short passes and light pressure are what prevent overheating.






Write Your Review
No reviews yet. Be the first to share your experience!