
Key takeaways
- Pulling out hair with force. This can bend the pins at their base and loosen the cushion.
- Soaking the entire brush. Handles and self-cleaning mechanisms are not always water-resistant.
- Using hot water. Warm water cleans effectively without risking adhesives or plastic components.
- Cleaning only when the brush looks full. Oils and dander build up before the pin bed appears clogged.
- Using a rusty brush. Rusted pins can snag fur and should not be used on a pet.
- Sharing an unwashed brush between pets. Clean it between animals when one has skin irritation, parasites, or a contagious condition.
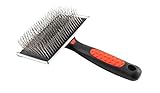
A slicker brush works by catching loose coat, undercoat, dirt, and small tangles on a bed of fine wire pins. When those pins become packed with hair or coated in oils and dried grooming product, the brush stops gliding through the coat. Worse, trapped debris can pull at fur, drag bacteria back onto freshly brushed areas, and hide bent or broken pins that may scratch skin.
Cleaning a slicker brush is simple, but it needs a gentle touch. Wire pins can bend easily, and soaking the wrong parts can damage a cushioned pad, wooden handle, or self-cleaning button mechanism. The method below works for standard slicker brushes as well as many retractable-pin styles in 2026.
As an Amazon Associate we earn from qualifying purchases at no extra cost to you. Product prices and availability are accurate as of the date shown and are subject to change.


What You Need
| Item | Why | Optional? |
|---|---|---|
| Wide-tooth comb or pet comb | Loosens the thick layer of hair caught at the base of the pins | No |
| Warm water | Helps dissolve light dirt and dried residue | No |
| Mild dish soap or pet-safe shampoo | Cuts through skin oils and grooming-product buildup | No |
| Small bowl or shallow pan | Lets you clean the pin area without soaking the handle | No |
| Soft toothbrush | Cleans between densely spaced pins and around the pin pad | Yes |
| Clean towel | Absorbs moisture and supports safe air-drying | No |
| 70% isopropyl alcohol in a spray bottle | Useful for occasional disinfection after parasites, skin infections, or multi-pet use | Yes |
| Disposable gloves | Helpful if the brush has fleas, scabs, or heavy skin debris on it | Yes |
Step-by-Step
1. Remove the loose hair first (2 to 5 minutes)
Start with a completely dry brush. Hold it over a trash can and use a wide-tooth comb, your fingers, or the end of another comb to lift the trapped hair from the base of the pins. Work slowly from one edge to the other rather than tugging up a large clump all at once.
If your slicker brush has a self-cleaning button, press it to retract the pins and lift away the released hair. Do not force hair out from underneath the pin plate with a sharp tool; that can damage the retraction mechanism. For a conventional brush, a comb with teeth spaced about 1/8 to 1/4 inch apart is usually easier to maneuver than a fine flea comb.
2. Check the pins and pad (1 to 2 minutes)
Once the hair is removed, inspect the wire pins in good light. Look for pins that are bent sideways, pushed deeply into the cushion, missing their protective tips, or sticking out at an odd angle. A few slightly bent pins can sometimes be straightened carefully with fingers or needle-nose pliers, but do not try to repair a brush with many damaged pins.
Also check the rubber or foam pin pad. If it is cracked, loose, sticky, or separating from the brush head, water can collect underneath and encourage mildew or rust.
3. Mix a mild cleaning solution (1 minute)
Fill a shallow bowl or pan with about 1 inch of warm water. Add 2 to 3 drops of mild dish soap or pet-safe shampoo. The water should feel comfortably warm, not hot. Hot water can weaken adhesives, warp some plastic brush backs, and affect a cushioned pin bed.
For a standard slicker brush, you only need enough solution to cover the wire pins. Keep wooden handles, padded grips, and metal joints above the waterline whenever possible.
4. Clean the pin area gently (3 to 5 minutes)
Dip only the bristle side of the brush into the solution for 30 to 60 seconds. Then use a soft toothbrush to scrub gently in the direction of the pins. Focus on the base of the pin pad, where oil and compacted dander tend to collect.
Do not press hard enough to flatten the pins. A slicker brush’s fine wires are designed to flex through fur, not withstand aggressive scrubbing. For a self-cleaning slicker brush, avoid submerging the handle, button, or sliding mechanism. Instead, dampen the toothbrush with soapy water and clean the pins and brush face by hand.
5. Rinse without soaking the brush (1 to 2 minutes)
Rinse the pin area under a light stream of lukewarm water, keeping the brush angled downward so water runs away from the handle. Alternatively, wipe it several times with a clean damp cloth. Continue until no soap remains; residue can make pins feel tacky and attract more dirt.
Never run a slicker brush through a dishwasher or leave it submerged in a sink. Extended soaking can rust pins, loosen glue, swell wood, and trap water inside retractable mechanisms.
6. Disinfect only when it is warranted (2 minutes, plus drying time)
Routine washing is enough for most household use. If the brush was used on a pet with fleas, a suspected fungal skin issue, an open sore, or heavy debris, lightly mist the pin area with 70% isopropyl alcohol after washing. Let it sit for about 1 minute, then blot away excess liquid with a towel.
Do not use bleach, hydrogen peroxide, essential oils, or strongly scented household disinfectants on grooming tools. These products can corrode metal, damage materials, or leave residues that may irritate a pet’s skin.
7. Dry completely before using it again (4 to 12 hours)
Press the pin area gently into a clean towel, then place the brush bristle-side down on a dry towel in a well-ventilated room. Let it air-dry fully before storing it in a drawer or grooming tote. Most brushes dry overnight; dense cushioned pads may take up to 12 hours.
Avoid using a hair dryer on high heat. High heat can soften plastic, loosen the pin pad, and make protective pin tips brittle.
Mistakes to Avoid
- Pulling out hair with force. This can bend the pins at their base and loosen the cushion.
- Soaking the entire brush. Handles and self-cleaning mechanisms are not always water-resistant.
- Using hot water. Warm water cleans effectively without risking adhesives or plastic components.
- Cleaning only when the brush looks full. Oils and dander build up before the pin bed appears clogged.
- Using a rusty brush. Rusted pins can snag fur and should not be used on a pet.
- Sharing an unwashed brush between pets. Clean it between animals when one has skin irritation, parasites, or a contagious condition.
How Often
Remove hair after every brushing session. For a pet brushed several times a week, wash the slicker brush with mild soap every 2 to 4 weeks. Clean it weekly during heavy shedding periods, especially if the brush is collecting visible skin oil, dust, or product residue.
If you groom multiple pets, clean the brush between animals when possible and disinfect it after use on any pet with fleas, ringworm concerns, skin infection, or unexplained irritation. A brush used only occasionally on one clean, short-haired pet may need a full wash only once a month.
When to Call a Pro or Replace
Replace a slicker brush when more than a few pins are bent, when pin tips are missing, when rust appears, or when the cushioned pad is cracked or loose. A basic replacement brush often costs about $10 to $20, while larger professional-style models with long pins may run roughly $14 to $30. Replacing a worn brush is safer than trying to rebuild its pin bed.
Call a veterinarian or professional groomer if brushing causes yelping, redness, bleeding, persistent scratching, or visible skin flakes. Do not keep brushing through matted fur with a slicker brush alone. Severe mats can pull painfully on the skin and may require professional clipping rather than more force at home.
FAQ
Can I wash a slicker brush with soap and water?
Yes. Use a small amount of mild dish soap or pet-safe shampoo in warm water, and clean only the pin area when possible. Rinse thoroughly and allow the brush to dry completely.
Can I soak a self-cleaning slicker brush?
No. Avoid soaking a self-cleaning brush because water may enter the button, spring, or retractable-pin mechanism. Wipe the handle and mechanism with a damp cloth, and wash the pin surface carefully with a damp toothbrush.
How do I get hair out of a slicker brush without hurting the pins?
Use a wide-tooth comb to lift hair from the base in small sections. Work from the outer edge inward, and avoid digging with scissors, knives, or other sharp tools that can cut the pad or bend pins.
Should I disinfect my slicker brush after every use?
No. Removing hair after each use and washing the brush every few weeks is enough for normal home grooming. Disinfect after parasites, contagious skin concerns, or use on multiple pets with questionable skin health.




Write Your Review
No reviews yet. Be the first to share your experience!